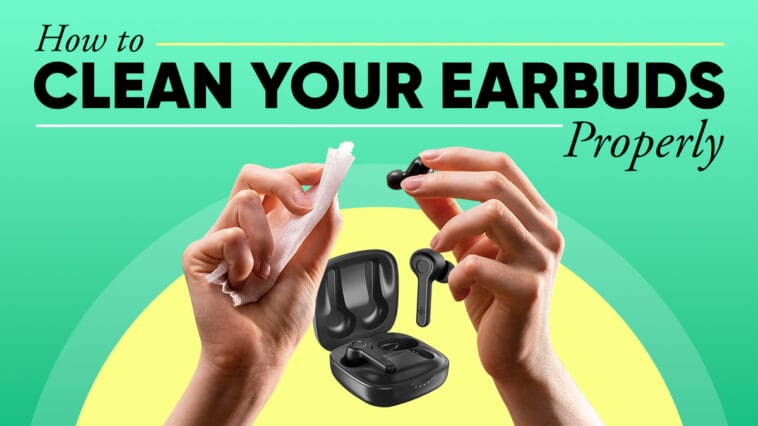
Earbuds go with us everywhere—on commutes, at the gym, during Zoom calls, and while binge-watching shows in bed. But for something we use every day, most of us rarely think about how clean (or gross) the earbuds are. Think about it: they go in your ears, sit in your pocket or bag, collect earwax, sweat, dirt, and who knows what else.
That buildup doesn’t just look nasty—it can also mess with your sound quality and even put your health at risk. The good news? Cleaning your earbuds is easier than you think, and it doesn’t take much time or fancy equipment. This guide breaks down what tools to use, what to avoid, and how often you should be doing it. Trust us—your ears (and your music) will thank you.
Why Cleaning Earbuds Matters (More Than You Think)
Dirty earbuds can impact your health and audio performance. Trapped moisture or bacteria can lead to ear infections, especially if you use earbuds after working out or in humid conditions. If you’ve ever felt itching, irritation, or a weird smell from your earbuds—well, it’s probably time for a clean.
Then there’s the performance angle. Blocked speaker grilles and dusty charging pins don’t just affect how your music sounds—they can mess with audio loudness, battery charging, and mic clarity. A simple wipe-down here and there might keep things running okay, but a proper clean make your earbuds last longer and perform better.
Know Your Earbud Type Before You Start

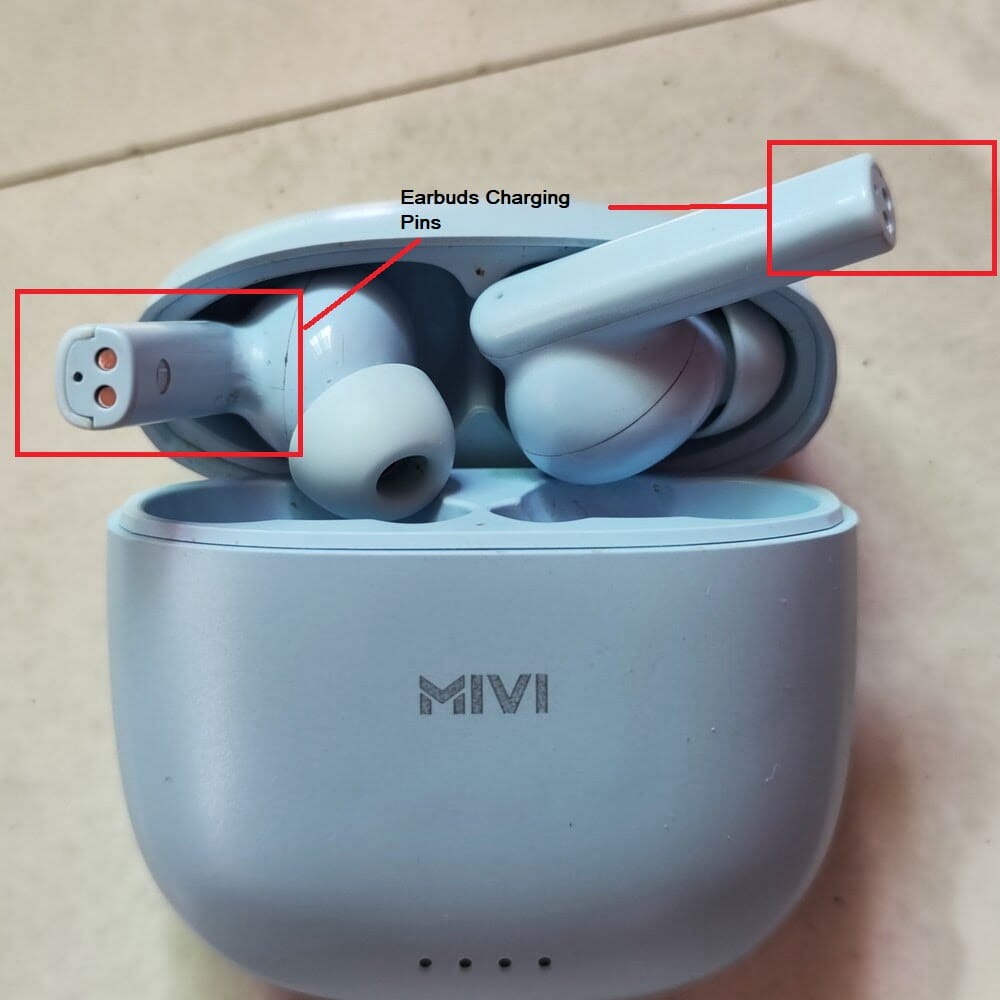
Not all earbuds are built the same, so cleaning them properly starts with knowing what kind you have. True wireless earbuds (like AirPods or Galaxy Buds) are compact and packed with sensitive parts—especially around the charging pins and mesh speakers—so they need extra care. Wired in-ear earbuds are usually more straightforward, but still have delicate mesh grilles that can be damaged by water or rough cleaning.
If your earbuds have silicone tips, you’re in luck—they’re washable and durable. Foam tips, on the other hand, are more fragile and can degrade if cleaned too aggressively. Always remove any tips before cleaning the buds themselves, and if you’re ever unsure, check the brand’s website for specific care recommendations.
Tools & Supplies You’ll Need
You don’t need a fancy electronics lab to clean your earbuds—just a few household items (and a little patience) will do the trick. Still, using the right tools makes all the difference between a safe deep-clean and a scratched-up speaker or water-damaged bud.
Start with a soft, dry microfiber cloth. This will be your go-to for wiping down the outer surfaces without scratching or pushing dirt further in. If you don’t have one, an old T-shirt works in a pinch—just avoid anything too abrasive.
Next, grab a few cotton swabs and toothpicks or a soft-bristled brush (like a clean toothbrush). These are great for cleaning around seams, speaker mesh, and in those tiny crevices where gunk likes to hide. If you want to step it up, you can also find inexpensive earbud cleaning kits online that come with anti-static brushes and loop tools.
For disinfecting, stick to isopropyl alcohol (70% or higher). It evaporates quickly, kills bacteria, and won’t damage your electronics if used correctly. Don’t soak your earbuds—just lightly dampen a cloth or cotton swab. Mild soap and warm water are fine for silicone ear tips, as long as you rinse and dry them thoroughly before reattaching them.
Compressed air can help blow out debris, especially from charging pins or around speaker grilles, but it should be used sparingly and never at close range—you don’t want to force dirt deeper or damage the mesh.
Step-by-Step Cleaning for Silicone-Tip Earbuds
Silicone-tip earbuds are some of the most common out there—and luckily, they’re also some of the easiest to clean. Whether you’ve got AirPods Pro, Galaxy Buds, or something similar, a regular cleaning routine will help keep them sounding sharp and feeling comfortable.
Step 1: Remove the silicone tips.
Start by gently pulling the tips off your earbuds. Most silicone tips pop off easily with a little pressure. Set the buds aside—you’ll clean those separately. Soak the tips in warm, soapy water (just a drop of mild dish soap will do) for about 5–10 minutes to loosen up any built-up gunk or earwax.
Step 2: Clean the speaker mesh.
Now turn your attention to the buds themselves. Use a dry toothbrush, soft-bristled brush, or a clean, dry cotton swab to brush away any visible debris on the speaker mesh. Be gentle—don’t press too hard or poke anything through the mesh. For stubborn grime, you can lightly dampen the tip of the swab with isopropyl alcohol, but make sure no liquid drips inside.
Step 3: Wipe down the exterior.
Use a microfiber cloth slightly dampened with alcohol to wipe down the rest of the earbud—around the seams, the stem, and the back. Pay extra attention to areas where sweat or dirt might collect, especially if you use your earbuds while working out or on the go.
Step 4: Rinse, dry, and reattach the tips.
Once the silicone tips are done soaking, give them a gentle rinse under warm water, then pat them dry with a paper towel or cloth. Let them air dry completely—don’t reattach them while they’re damp. Once they’re dry, pop them back onto the earbuds.
And that’s it! Clean earbuds, better sound, and no more wondering what that weird fuzz stuck in your speaker grill actually was.
Step-by-Step Cleaning for Foam-Tip Earbuds
Foam tips give you that perfect snug fit and noise isolation—but they’re also more delicate than silicone. Here’s how to clean them without ruining their texture or shape:
Step 1: Remove the foam tips from your earbuds.
Gently pull the foam tips off the earbuds and set the earbuds aside. Do not try to clean them while attached, as foam is easily damaged with too much pressure.
Step 2: Dry brush the surface.
Use a soft toothbrush or clean, dry microfiber cloth to gently brush off any surface debris—like dust, wax, or lint. This alone might be enough for light cleaning.
Step 3: Do a quick soap-and-water rinse (if needed).
If the tips still feel dirty, fill a small bowl with warm water and a drop of mild liquid soap. Dip the foam tips briefly and gently squeeze them to let water pass through the pores. Avoid soaking them for more than a minute or two, and never scrub them aggressively.
Step 4: Rinse and gently press out excess water.
Run the tips under clean water to remove any soap residue. Then, lightly squeeze them between your fingers or a clean towel to remove excess moisture. Don’t twist or wring them out, as that can damage the foam.
Step 5: Let them air dry completely.
Place the foam tips on a clean, dry towel in a cool area and allow them to air dry naturally. This may take several hours. Avoid using heat or leaving them in the sun, as it can cause the foam to degrade.
Step 6: Reattach only when dry.
Once they’re completely dry and have returned to their original shape, reattach them to your earbuds. If they feel stiff, torn, or don’t expand like they used to—it’s time to replace them.
Mistakes to Avoid
Cleaning your earbuds should help them last longer—not ruin them. But you’d be surprised how many people accidentally damage their gear just by being a little too rough or using the wrong tools. So before you dive in with a cotton swab and good intentions, let’s talk about what not to do.
- Don’t use too much liquid.
This is the #1 mistake. It might feel tempting to soak your earbuds or apply cleaning solution directly onto them, but excess moisture can seep into speaker drivers, internal circuits, or charging ports. Even water-resistant earbuds aren’t waterproof when it comes to cleaning—always apply liquid to a cloth or swab first, never directly to the device. - Avoid harsh chemicals and cleaners.
No bleach. No glass cleaner. No hydrogen peroxide. These can corrode surfaces, wear down coatings, or even damage the speaker mesh. Stick to 70%+ isopropyl alcohol or a gentle mix of water and mild soap when needed. - Don’t poke around with sharp objects.
That stubborn wax in the speaker grille might be annoying, but using a paperclip, pin, or needle is a fast way to puncture a driver or destroy delicate mesh. If you need precision, use a soft brush, toothpick, or buy a cleaning kit made specifically for earbuds. - Avoid blasting compressed air directly into speaker holes.
Compressed air seems helpful—but if used incorrectly, it can push dirt deeper into the mesh or even damage sensitive internal parts. If you do use it, hold it a safe distance away and use short, gentle bursts. Never stick the nozzle inside any openings.
Final Thoughts: Keep Your Earbuds Clean, Keep Your Sound Clear
A quick clean here and there might not seem like much—but over time, it makes a big difference. Whether you’re using them for workouts, Zoom calls, or just zoning out to your favorite playlists, clean earbuds sound better, last longer, and keep your ears healthier. With just a few basic tools and a little know-how, you can make sure your earbuds stay fresh, functional, and ready for whatever your day throws at you.
So go on—take five minutes, and give your earbuds the spa day they deserve. Your ears (and your music) will thank you.
FAQ: Cleaning Your Earbuds
Ideally, you should give your earbuds a light wipe-down after every few uses—especially if you wear them during workouts. A more thorough cleaning, including the tips and speaker mesh, should be done at least once a week to prevent buildup and maintain sound quality.
If you’d rather avoid alcohol, you can use a slightly damp microfiber cloth with a bit of warm water and a drop of mild dish soap. Make sure to wring out the cloth well so it’s just barely damp. Always dry your earbuds thoroughly afterward and avoid getting moisture into any speaker or charging ports.
Rubber or silicone ear tips are pretty easy to clean. Simply remove them from the earbuds and soak them in warm soapy water for 5–10 minutes. Rinse well, pat dry with a towel, and let them air dry completely before reattaching. Avoid using harsh cleaners or scrubbing too hard, as that can damage the material.


Comments
Loading…