Are your headphones not showing up on Windows 11? You plug them in, expecting sound—and nothing happens—no sound, no detection, not even an error message. Don’t worry—you’re not alone, and more importantly, the fix is usually simple. Whether you’re using wired headphones through a 3.5mm jack or a USB headset, this guide will walk you through every method to troubleshoot and fix headphones not showing up on Windows 11.
Let’s dive in.
Step 1: Start with Basic Checks
Before going into advanced troubleshooting, let’s rule out some common hardware and user-related issues.
1.1 Make Sure the Headphones Are Properly Plugged In
Sounds obvious, but you’d be surprised how often this causes the issue. Double-check that:
- The headphones are securely connected to the correct port (3.5mm jack or USB port)
- You’re not using a faulty adapter or extension
- The port isn’t damaged or filled with dust
If your laptop has multiple audio jacks, try the other one. Also, test the headphones on another device like a phone or tablet to ensure they’re working.
1.2 Check if Headphone Is Faulty
The best way to determine if your headphones are faulty is to try them out on another device. If the headphones work with the other device, they are functioning properly. If they don’t work, the issue may be with Windows 11 or it could indicate a hardware problem with your laptop.
1.3 Check Volume and Mute Settings
Sometimes, it’s not a connection issue—it’s just muted sound. Look for:
- Muted system volume (click the speaker icon in the system tray)
- Application-specific sound (some programs like Zoom or VLC use different audio settings)
- Your keyboard’s mute key (FN + Volume Mute can often be the culprit)
1.4 Restart Your Computer
If everything seems fine but your headphones still aren’t showing up, a simple restart can reload audio services and resolve temporary bugs.
Step 2: Adjust Windows Sound Settings
Once you’ve confirmed the issue isn’t hardware-related, it’s time to check Windows 11 settings in order to fix Headphones Not Showing up in Windows 11.
2.1 Set Headphones as Default Output Device
Sometimes Windows simply routes sound to the wrong device.
How to fix it:
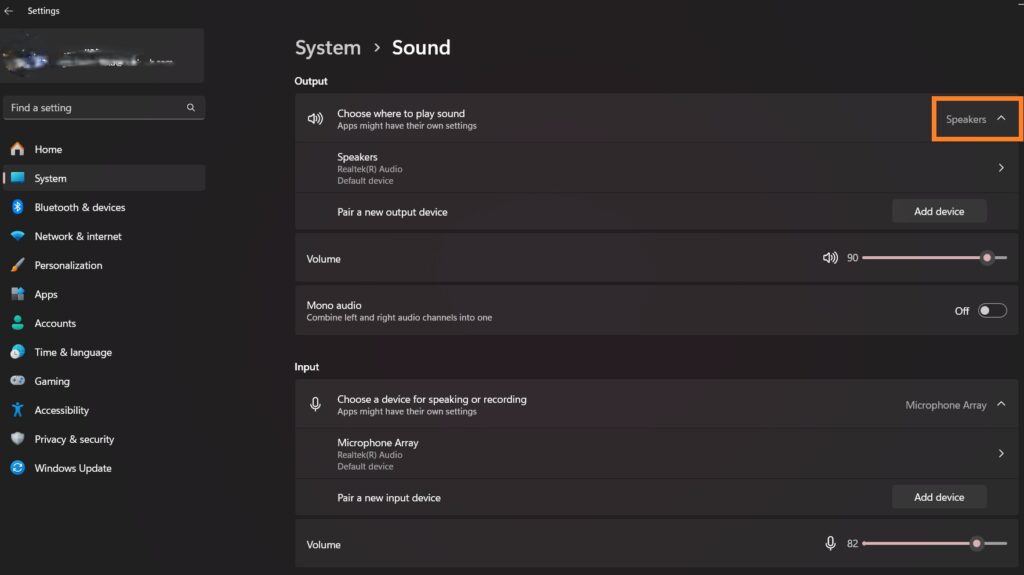
- Open Settings > System > Sound
- Under Output, select your headphones
- If they don’t appear, click “All sound devices” and enable the headphones if they’re listed as disabled
This step is especially useful when Windows 11 is not detecting headphones after a recent update.
2.2 Use the Audio Troubleshooter
Windows 11 has a built-in tool that detects and fixes common audio problems.
Here’s how to run it:
- Go to Settings > System > Troubleshoot > Other troubleshooters
- Scroll to “Audio” and click Run
Follow the prompts. If your headphones are not recognized, the troubleshooter may reactivate them or suggest a fix.
Step 3: Fix Driver Issues
Outdated, corrupted, or missing audio drivers are one of the most common causes when headphones are not showing up in Windows 11.
3.1 Update Audio Drivers
Drivers ensure that hardware components like headphones communicate properly with your OS. Here’s how to update them:
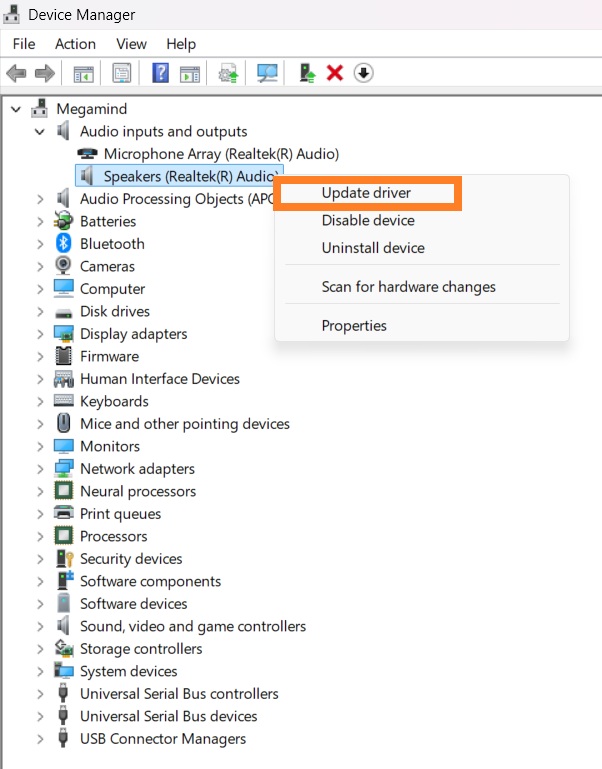
- Press Win + X and select Device Manager
- Expand Audio Inputs and outputs
- Right-click your audio driver (e.g., Realtek or Intel) and select Update driver
- Choose Search automatically for drivers
If an update is found, Windows will install it. Otherwise, you can download drivers directly from your laptop or motherboard manufacturer’s website.
3.2 Uninstall and Reinstall Drivers
Still not working? Try a full reinstall.
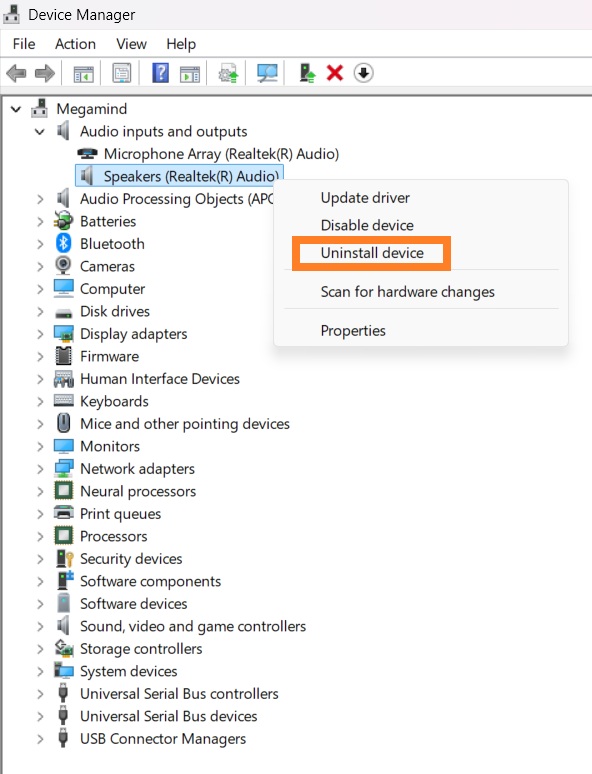
- In Device Manager, right-click the audio driver and select Uninstall device
- Restart your PC
- Windows will reinstall the driver automatically on boot
You can also install the latest driver manually by downloading it from your PC brand’s support page.
3.3 Use a Driver Updater Tool (Optional)
If you’re uncomfortable manually managing drivers, tools like Driver Easy or Driver Booster can scan and install updates for you. These are especially helpful if you’re facing issues like the headphone jack not working in Windows 11 after a major system update.
Step 4: Enable Hidden or Disabled Playback Devices
Sometimes Windows hides inactive audio devices—even if they’re plugged in.
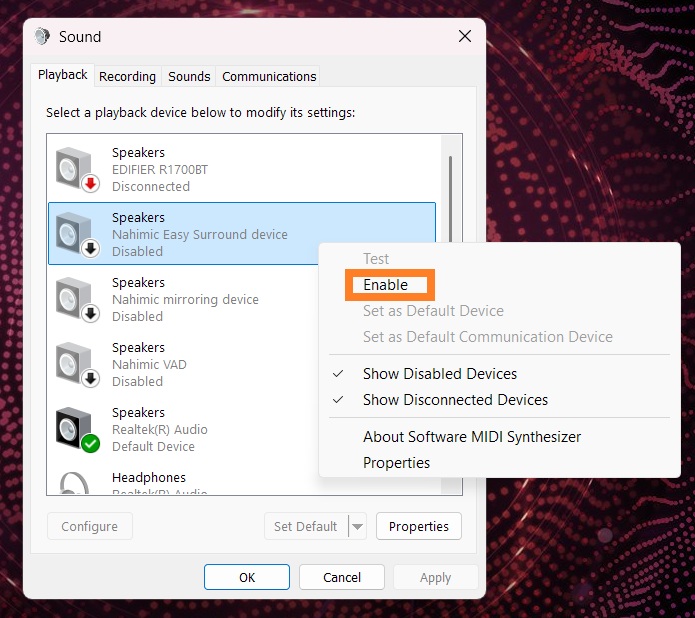
- Right-click the volume icon in the taskbar and choose Sound settings
- Scroll down and click More sound settings
- In the new window, go to the Playback tab
- Right-click in the window and ensure “Show Disabled Devices” is checked
- If your headphones show up, right-click them and select Enable
- Then click Set as Default Device
This quick fix often solves the “headphones not recognized in Windows 11” problem, especially after driver changes or updates
Step 5: Turn Off Audio Enhancements
Some audio drivers come with built-in enhancements that can interfere with headphone detection or audio output.
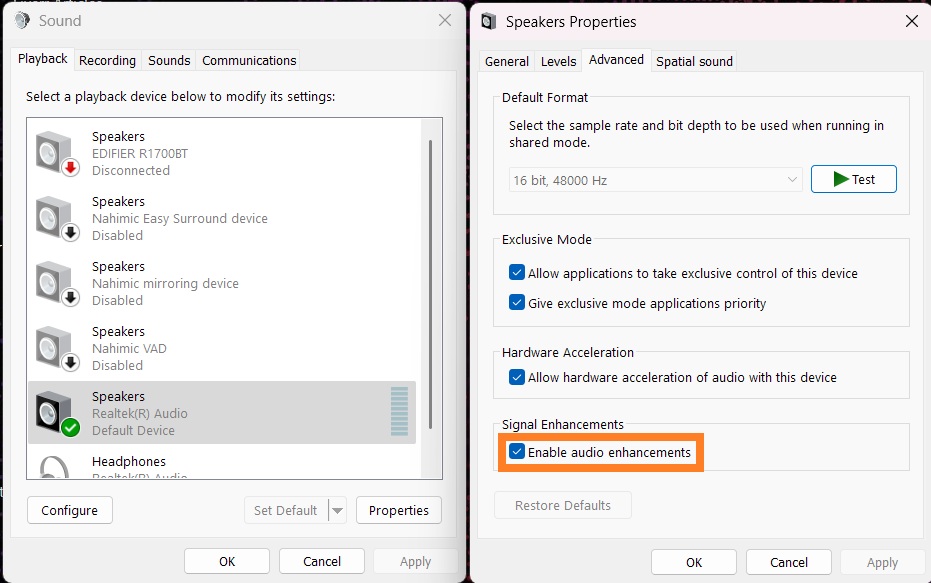
How to Disable Enhancements:
- Go to Settings > System > Sound
- Scroll down to Advanced > More sound settings
- In the Playback tab, right-click on your headphones and choose Properties
- Go to the Advance tab
- Uncheck the box “Signal Enhancement”
- Click Apply > OK
This setting is especially relevant when troubleshooting headphones not working on Windows 11 after a fresh install or system restore.
Step 6: Change the Default Audio Format
Changing the format can fix compatibility issues between the headphones and Windows 11’s audio processing.
Steps:
- Open More sound settings (as above)
- Go to Playback > Headphones > Properties
- Under the Advanced tab, find Default Format
- Choose a different setting, like 16 bit, 44100 Hz (CD Quality) or 24 bit, 48000 Hz (Studio Quality)
- Click Test and then Apply
Try several settings—sometimes, one format works where others don’t.
Step 7: Check for Windows Updates
New updates can fix known bugs, compatibility issues, or introduce improved drivers.
To Check for Updates:
- Open Settings > Windows Update
- Click Check for Updates
- Install any pending updates and restart your PC
If your issue started after a specific update, consider rolling it back from Settings > Windows Update > Update history > Uninstall updates.
Step 8: Advanced Fixes (For Power Users)
If you’ve tried all the above and Windows 11 still won’t detect your headphones, consider these more technical options.
8.1 Check BIOS Settings
In rare cases, audio can be disabled from the BIOS (Basic Input/Output System). To check:
- Be cautious when adjusting BIOS settings. If unsure, consult your customer care or technician Restart your computer and press the BIOS key (usually F2, DEL, or ESC during startup)
- Look for Integrated Peripherals or Audio Configuration
- Ensure HD Audio or Onboard Audio is Enabled
- Save changes and exit
Do check device’s support documentation before proceding with this step.
8.2 Inspect Hardware Faults
If your headphone jack isn’t working, even on different OSes or devices, the port itself may be physically damaged. USB headphones or external DACs (digital audio converters) can serve as a reliable workaround.
Step 9: Try Alternative Audio Devices
If none of the solutions work, consider using:
- Bluetooth Headphones – Useful if your wired headphone jack is broken
- USB Headphones – Bypass the internal audio system entirely
- External Sound Card / USB Audio Adapter – A small investment that often fixes compatibility issues permanently
These external solutions are especially helpful if your headphones not showing up on Windows 11 is caused by faulty internal hardware.
Conclusion
Dealing with headphones not showing up in Windows 11 can be frustrating, but the good news is that in most cases, it’s easily fixable. From simple hardware checks to tweaking audio settings and updating drivers, this guide provides a complete step-by-step process to help you get your headphones working again.
Here’s a quick recap:
- Start with basic checks and volume settings
- Use Windows sound settings to select the correct device
- Update or reinstall audio drivers
- Show and enable disabled playback devices
- Turn off enhancements and adjust audio format
- Keep Windows up to date
- Try advanced BIOS checks or external solutions
If all else fails, consider contacting your PC manufacturer or using external hardware like a USB sound card. With a little patience, you’ll be back to enjoying your music, calls, or games in no time.
FAQs
Possible reasons include disabled playback devices, outdated drivers, incorrect sound settings, or hardware faults.
Go to Settings > System > Sound > Output, and select your headphones. Or use More sound settings to manually enable them.
Yes, audio driver issues are among the most common causes. Updating or reinstalling drivers often resolves the problem.
Driver compatibility or system settings may have changed. Try reinstalling drivers, disabling enhancements, or changing audio formats. If nothing works, you may need to buy new headphones or downgrade your OS to Windows 10.
Yes. Ensure they are properly paired and selected as the default output device in the sound settings.


Comments
Loading…