Roku produces some of the greatest streaming sticks and gadgets on the market, with hundreds of streaming applications to appeal to a wide range of viewers. Whether you are looking for movies, TV, music, or even games, Roku provides a plethora of apps to cater to all of those various forms of media.
But before you can start exploring all your Roku streaming stick or device has to offer, you will need to go through a few setup procedures. Connecting your Roku streamer to your WiFi is one of them. This is required before searching for and downloading popular Roku OS streaming apps like Spotify, Netflix, Disney Plus, etc.
We have produced a guide to teach you how to connect a Roku streaming stick to Wi-Fi or TV.
It is not difficult, but it is essential to use your Roku streaming stick or device.
Before you start,
Before you can connect your Roku over Wi-Fi, there are a few things you need to do first. Naturally, the first thing you should do after taking your brand new Roku streamer out of the box is connect it to your TV.
You’re going to read about that in the next section.
When you get there, the first thing you will be asked to do is link your Roku remote with the streaming device that is hooked to your TV. That is another really basic procedure for which we have provided a tutorial in case of issues in the next section. There, you can learn all you need to know about pairing a Roku remote.
After you have completed those two steps, you will have to connect your Roku streaming stick or device to your Wi-Fi. Next, we will walk you through the steps to make you ready to explore the Roku OS at your leisure.
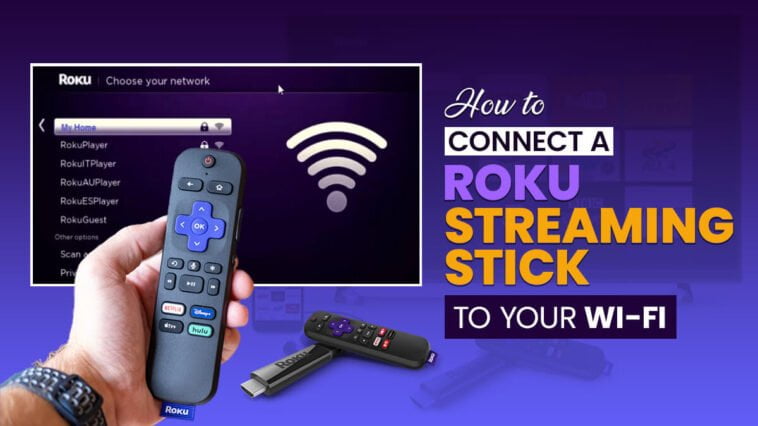
How to Connect a Roku Streaming Stick to a Wi-Fi Network
If you are just getting started with your Roku streaming stick or device, you will see a request to connect to the internet before you can peruse the menu. If you possess a streaming box, such as the Roku Express 4K, you will be able to connect via wired connection if you have connected it to your provider’s router through an ethernet cable.
You will only be able to connect wirelessly if you possess a Roku Streaming Stick. Choose the option that best matches your devices and/or preferences in each situation. You will then see a list of networks to which you may connect.
Locate and choose your network name (SSID) from the list. If your network is not shown, try choosing the ‘Scan again to view all networks’ option, which essentially refreshes the list. If that fails, try resetting your router. Your Roku device may need a new connection for your network to appear in the list.
After you have chosen your network, a pop-up window will appear asking you to enter your Wi-Fi password. This may be found on the router itself or on a separate card that comes standard with most routers.
If you input your password successfully, your Roku streaming stick or device will be connected to the internet and you will be able to explore the complete Roku OS.
You will not only be able to download and subscribe to the greatest streaming applications available in one handy location, but you may also discover a new favorite among the more unusual apps offered in the Roku Channel Store.
Not only that, but you will be able to reap the advantages of the impending Roku OS 11 upgrade, such as a new AI-driven language enhancement option.
How do I connect my Roku Streaming Stick to my TV?
Connecting your Roku to your TV is pretty straightforward.
Step 1: Hook up your Roku to your TV
Whether you have a box or a streaming stick, you will need to connect a few items. To use the Streaming Stick Plus as an example, connect the accompanying USB power cord to the Roku and then connect the Roku to your TV’s HDMI port.
The Streaming Stick can utilize a USB input on your TV if it has at least 5 volts of electricity (some manufacturers mention the voltage next to the USB identification) to get the most performance out of it.
However, if possible, we suggest utilizing the provided wall adapter to keep the Roku fueled up and ready to go. With the Streaming Stick Plus, Roku offers a USB extension cable.
If your TV is wall-mounted and the HDMI port is difficult to reach, making it tough to plug in the Streaming Stick, Roku offers a free HDMI extender.
After you have hooked everything in, switch on your TV and pick the port into which you have inserted your new Roku.
Step 2: Connect the Roku remote
After connecting your Roku and moving your TV to the appropriate input, you should see Roku’s UI ready to assist you with the following steps.
You will very certainly have to link the provided remote with your Roku device (although some devices may be paired already).
Install the provided batteries in the remote before pairing. If it does not connect automatically, hold down the pairing button next to the battery slot for 3 seconds.
Step 3: Connect the Roku to Wi-Fi and finish the remainder of the setup
We may now begin the setup procedure. After selecting your language, connect to Wi-Fi. You may skip this step if you have a Roku Ultra box or an Express 4K Plus with an Ethernet adapter that is hooked in through wired Ethernet. Everyone else, connect to your wireless network and input your password.
Wi-Fi
After ensuring that you are connected to the internet, your Roku may need an upgrade to the most recent OS version. Allow it to accomplish this and then go do something else for a while. This should just take a few minutes, however, the duration may vary depending on your internet connection.
Display (your TV)
When you update your Roku, it will ask you to autodetect the sort of TV you have. Allow this to run once you hit OK. It will choose the finest media-playing settings for your TV. If there is a problem, you may redo the test; otherwise, choose OK and go to automated. If the screen seems to be in excellent condition, click OK at the following request.
If the Roku detects limits from your TV’s HDMI connection, it will explain what type of playback your TV can handle before giving you the choice to “Force output to automatic,” “Cancel,” or “I have changed something, retry.”
Although it may seem illogical, pressing Cancel will take you to the following page, where Keep Auto detect should already be checked. If it is not there, browse through the alternatives until you locate it and then click on it. By pressing OK on your remote, you advance to the next stage in the setup procedure.
Configure TV controls
If you have a Roku with a TV-controllable remote, a request will pop up to set it up right away. Your Roku will sync with your TV’s volume and power settings, allowing you to operate both using the Roku remote. Click OK and then follow the on-screen instructions.
Music will begin to play, so keep your remote aimed at the television. Follow the procedures; if the music immediately stops, you are good to go.
Otherwise, choose No and Enter TV brand. Enter the brand of your television and continue the procedure until the remote syncs with your television.
Step 4: Connect your Roku account and turn on your device
To utilize your new Roku, you must first create a Roku account. The accounts are free, but you must create one if you do not already have one. To connect your accounts, enter your email address on the screen.
The onscreen display will instruct you to check the email address you just entered after you enter your email. You come across an email with the subject “Activate your device.”
Clicking the link there brings you to Roku’s website, where you can either register a new account or go to the next step if you already have one.
After that, assign your gadget to a room (or give it a unique name) and accept the user agreement. Then you will be guided through a questionnaire that asks about your current subscriptions (such as Netflix, Disney Plus, Hulu, Prime Video, or HBO Max) as well as your hobbies.
You may also skip this section, but you will still be sent to a website with even more channels to install, as well as a free trial offer.
By clicking “Continue” on these screens, your Roku will (finally) begin downloading and installing the applications. To view, you will still need to sign in to each app (Netflix, Amazon Prime Video, and so on) separately.
That is all. After following the above steps, you can connect a Roku streaming stick and your Roku should now be operational.
If you want additional control, download the Roku app for iOS or Android, which turns your phone into a Roku remote, or add the Roku skill to your Google Assistant or Alexa app for voice control from smart speakers like the Google Home or Amazon Echo.
Roku also provides a few training films to assist you in getting the most out of your device.
FAQs
Why won’t my Roku Streaming Stick connect?
If you are having trouble connecting to the internet, restart your router. Increase the power of your wifi signal. If rebooting your router does not improve your connection, the problem might be a weak wifi signal. The greater the distance between your Roku device and your network, the weaker your wireless connection.
Will Roku Streaming Stick work on any TV?
Your Roku Streaming Stick+ is compatible with any TV that has an HDMI® connector and connects straight to the TV’s HDMI port.


Comments
Loading…